


Table of contents
- What is React?
- Why you should learn React?
- 1. React is easy to use
- 2. There is high demand for React Developers
- 3. The React community is amazing
- Step 1: Setting up your development environment
- Step 2: Create a new project
- How To Install React
- Create React App (CRA) vs. Vite: Comparing the Folder Structure
- Step 3: Learn the Basics of React:
- Step 4: Dive into React Ecosystem and Tools:
- Step 5: Practice and Build Projects:
- CONCLUSION
What is React?
React is a free and open-source JavaScript-based UI library used for creating component-based user interfaces. React is maintained by Meta (previously Facebook) and a community of individual developers and organizations.
Why you should learn React?
React has become one of the most popular JavaScript libraries used for building interactive web applications. Here are 3 reasons why you need to learn React:
1. React is easy to use
React is known for its relatively gentle learning curve compared to other JavaScript frameworks. it is popular for its simplicity, virtual DOM, component reusability, unidirectional data flow, strong community support, and helpful development tools making it an easy-to-use framework. Whether you are a beginner or an experienced developer, React's user-friendly nature enables you to quickly grasp its concepts, start building applications, and enjoy a smooth development experience.
2. There is high demand for React Developers
React has witnessed exponential growth and is widely adopted by many leading tech companies. It has become a highly sought-after skill in the job market. Learning React opens up numerous career opportunities and increases your chances of landing a job in the web development industry.
3. The React community is amazing
React has a massive community of dedicated developers. The community helps to maintain and grow the open-source library, allowing everyone to be able to contribute their components to the library.
The community is also so strong because of the great tools you can work with in React, including React Profiler and React dev tools.
In summary, React is relatively simple to learn, offers a lot of job opportunities, and has a large community of support with many open-source projects on GitHub.
Whether you are a seasoned developer or you are just starting, learning React can be a rewarding and valuable skill. In this blog post, we'll walk you through the basics of getting started with React and provide you with the resources you need to kickstart your journey into the world of React development.
Step 1: Setting up your development environment
Before you can start building your applications, you need to set up your development environment. Here are the key steps:
a. Install Node.js: React depends on Node.js for running JavaScript code outside of the browser. Visit the official Node.js website (https://nodejs.org) and download the latest LTS (Long Term Support) version suitable for your operating system. Follow the installation instructions on the website to complete the setup.
b. Choose a Code Editor: You can use any code editor of your choice, such as Visual Studio Code, Sublime Text, or Atom. Install your preferred code editor and make sure you're comfortable using it.
Step 2: Create a new project
You would need to have Node installed in your system, to check if you have Node installed, open your terminal/command prompt and run node -v or npm -v. Ensure you have node>=14.0.0 and npm>=5.6. If you do not have them installed, check Step 1.
How To Install React
a. Working Environment Using Create-React-App (CRA)
This popular tool was previously the recommended way to start a new React project, but it has since been deprecated by the React team. Although it is still functional, developers are now encouraged to use alternative tools like Vite.
The first step is to start your terminal/command prompt, navigate to the folder where you want to save your React application, and then run this command:
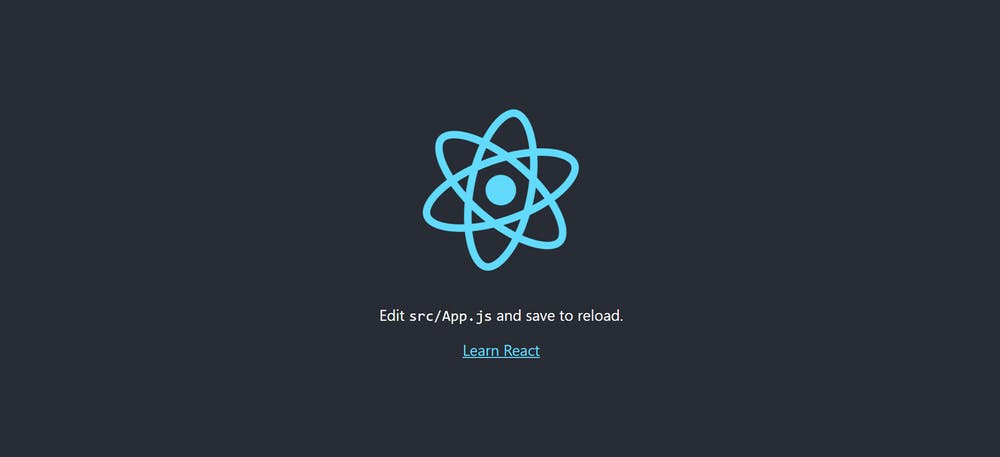
npx create-react-app my-react-app
Note: my-react-app is the name of the application we are creating, but you can change it to any name of your choice.
This command creates a my-react-app project folder and includes all the starter files. Once the project is created, navigate to the project directory:
cd my-react-app
We will see a file structure that looks like so:
my-react-app
    ├── node_modules
    ├── public
    │    ├── favicon.ico
    │    ├── index.html
    │    ├── logo192.png
    │    ├── logo512.png
    │    ├── manifest.json
    │    └── robots.txt
    ├── src
    │    ├── App.css
    │    ├── App.js
    │    ├── App.test.js
    │    ├── index.css
    │    ├── index.js
    │    ├── logo.svg
    │    ├── reportWebVitals.js
    │    └── setupTest.js
    ├── .gitignore
    ├── package-lock.json
    ├── package.json
    └── README.md
Take a moment to explore the project structure. Key files and folders include:
node_modules: Contains the files of the project’s dependenciespublic/: Contains static files that are publicly accessible.src/: Contains the main source code of your application.App.js: The main component of your application.index.js: The entry point of your application..gitignore: Lists the directories and files to ignore when we commit to a repository.ReadME.md: This is intended to provide instructions about the project.package.json: Contains meta-information about the project.
Running the Development Server
In the command line interface, run the following command to start the development server:
npm run start
#or
npm start
React will compile your code and open a browser window with your application running on a local server.
The application should launch automatically in the browser window on port 3000. If nothing happens, visit localhost:3000 in the browser address bar to see the default app.
b. Working Environment Using Vite
Vite is a build tool that we can use to set up React projects. It provides faster installation and instant server start times compared to the create-react-app CLI. This makes it a go-to solution for most developers when creating a React project.
The first step is to start your terminal/command prompt, navigate to the folder where you want to save your React application, and then run this command:
With NPM
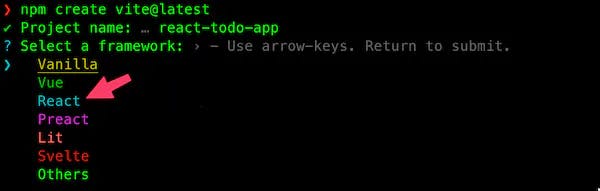
npm create vite@latest
With Yarn
yarn create vite@latest
With PNPM
Pnpm create vite@latest
We’ll enter a project name (for example, my-react-app) and then select React from the list of frameworks:
We’ll be prompted to select a variant between JavaScript and TypeScript. We’ll choose JavaScript.
Once that is done, let’s cd into the project folder and run npm install to install the necessary dependencies in the local node_modules folder.
cd my-react-app
npm install
we will see a file structure that looks like this
my-app/
├── node_modules/
├── public/
│   ├── favicon.ico
│   ├── index.html
│   └── ...
├── src/
│   ├── components/
│   │   ├── Header.js
│   │   ├── Footer.js
│   │   └── ...
│   ├── pages/
│   │   ├── Home.js
│   │   ├── About.js
│   │   └── ...
│   ├── App.js
│   ├── index.js
│   └── ...
├── .gitignore
├── package.json
├── README.md
└── ...
Then, open the package.json file to see the following scripts:
"scripts": {
  "dev": "vite",
  "build": "vite build",
  "preview": "site preview"
},
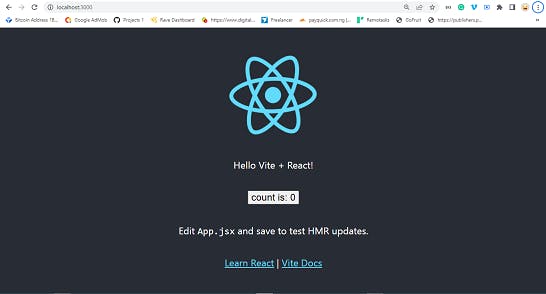
Start the development server to see your React application in action, start the development server. In the terminal or command prompt, run the following command(we'll be using npm here):
npm run dev
The application should start automatically in the browser window on an available port. If nothing happens, check the terminal and visit the URL printed in it:
Create React App (CRA) vs. Vite: Comparing the Folder Structure
Like the CRA, the src folder inside a Vite project also contains the working files. However, while the CRA uses the index.js file as the entry point, Vite uses main.jsx.
On the file extension, CRA is lenient as it allows both .js and .jsx files to write React JSX code. But Vite requires .jsx files by default for JSX code. In this course, we will use Vite to create our projects. However, you can follow along using your preferred solution.
Step 3: Learn the Basics of React:
To build React applications effectively, it's essential to understand the fundamental concepts of React. Here are some key concepts to get you started:
Components: React uses a component-based architecture. Learn about functional components and class components, and how they can be used to build reusable UI elements.
JSX: JSX stands for JavaScript XML, it is a syntax extension for JavaScript that allows you to write HTML-like code within your JavaScript files. Learn how to use JSX to build dynamic UIs.
State and Props: Understand the concept of state and props in React and how they are used to manage and pass data between components.
React Lifecycle: Explore the various lifecycle methods available in React and how they can be used to handle component initialization, updates, and unmounting.
Step 4: Dive into React Ecosystem and Tools:
React has a rich ecosystem with numerous libraries and tools that can enhance your development experience. Here are a few popular ones worth exploring:
React Router: A library for handling routing in React applications.
Redux: A predictable state container for managing application state.
Axios or Fetch: Libraries for making HTTP requests from your React application.
Styled Components or Tailwind: Libraries for styling your React components.
Step 5: Practice and Build Projects:
To reinforce your learning and gain practical experience, it's very important to build projects. Start with small, manageable projects you think you can handle then gradually increase the complexity as you become more comfortable with React. There are many online tutorials, courses, and open-source projects available to help you get hands-on experience. Here are projects you can build as a beginner:
To-Do List Application:
A to-do list application is a classic project that allows you to practice fundamental React concepts such as component rendering, state management, and event handling. You can create a simple interface where users can add tasks, mark them as complete, and delete them. You can enhance the project by implementing features like filtering tasks by status or adding due dates.
Emoji Search
We use several emojis daily while chatting with our friends and colleagues on messaging apps like WhatsApp, Facebook Messenger, Snapchat, etc.
Create a cool search app where you can type and search for any emoji from the given list of emojis.
Weather Application:
Building a weather application provides an opportunity to integrate external APIs and work with asynchronous data fetching in React. You can utilize weather APIs to retrieve weather data based on a user's location or a manually entered location. You can display the weather information by giving it a simple and pleasing look, incorporating features like displaying the forecast for upcoming days.
Movie Database:
Build a movie database application where users can search for movies, view details like ratings, release dates, and descriptions, and save movies to a favorites list. This project will help you work with APIs, handle data filtering and sorting, and implement user authentication for managing favorites.
E-commerce Shopping Cart:
Develop a basic e-commerce shopping cart application that allows users to browse products, add items to the cart, and proceed to checkout. Focus on building components for product listing, cart management, and order processing. You can explore integrating payment gateways or implement features like managing user profiles and order history.
Remember, the key is to start with smaller, achievable projects and gradually increase the complexity as you gain confidence and understanding. Utilize online resources, tutorials, and documentation to guide you through each project. Additionally, consider contributing to open-source projects or exploring coding challenges on platforms like GitHub or CodePen to further enhance your skills and learn from real-world scenarios.
CONCLUSION
Getting started with React can be an exciting journey. By following the steps outlined in this blog post, you've set up your development environment, created a new React project, and learned the basics of React development. Remember to practice regularly, explore the React ecosystem, and build projects to solidify your understanding. If you enjoyed this article, you can follow me on GitHub or Twitter. Happy coding!